Technical Note - Scanning documents
This Technical Note is obsolete
Summary
ECS has a scanner for use by students and staff. The scanner is in
CO322. You will have to ask at the
School Office to gain access to the room.
The colour photocopier in
CO358A may also be used for scanning. Images files are emailed to the address you specify.
Details
How to Scan Documents
First open ScanGear Toolbox on desktop. You should see this window:
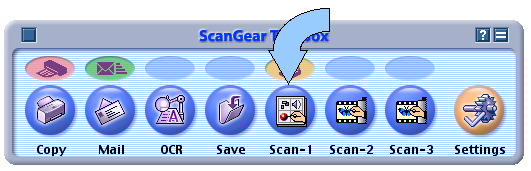
Click on Scan-1. This will bring up a new dialog box:
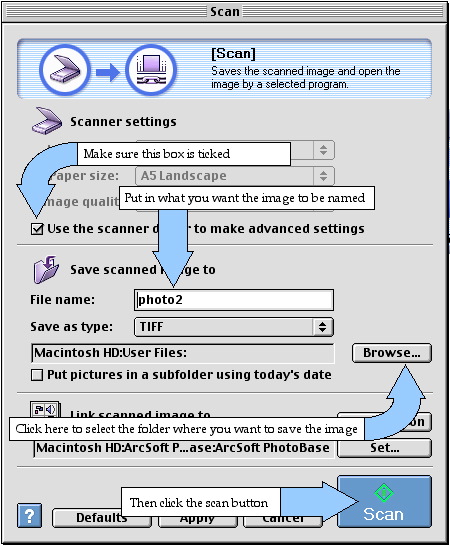
Make sure the "Use the scanner driver to make advanced settings" box is ticked. Make sure you have a folder under your name in the User Files folder on the desktop. If you don't then you need to create one.
To create a new folder open the user files folder, then go to the file menu at the top of the screen and select New Folder, then type in what you want the new folder to be called.
Now you have to select your folder, go back into the ScanGear window and click Browse. Click on desktop, then open user files, then click once on your file and press select.
Type in what you want the image you are scanning to be called under file name.
Place the object you wish to scan in the scanner (make sure that it is straight).
Click the scan button. The scanner will now do a brief previw scan and show you a picture of your object:
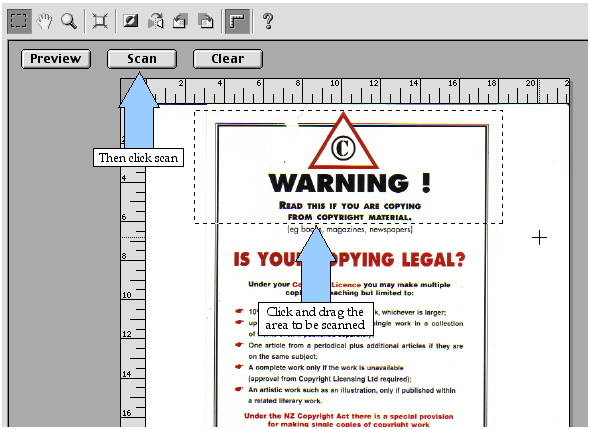
Wait until the scanner is finished previewing the page.
Click and drag to select the area to be scanned. If you want an exactly sized area you can specify this under main preferences (see
ScanGear Options Explained).
Once the area is selected, and you are happy with your scan options (see
ScanGear Options Explained) then you can click the scan button. This will scan the area you selected and save this as a file to the folder you selected.
Using Photoshop
You can use Photoshop to Manipulate the Image in a variety of ways.
- Change Colours.
- Remove scratches from Images.
- Change Image Size, or Resolution.
- Change Brightness or Contrast.
- Apply Effects.
The one that is probably most important is the ability to change Image/Resolution.
Changing Image Size or Resolution
This allows you to change the size of the image, by manipulating the height and width, or reduce the resolution while retaining the size of the image, this is good for making images for the web, as screen resolutions are not as high as printer resolutions.
This dialog also gives you an idea of the file size.

When saving the file as a tiff or gif file format will reduce the file size further due to the graphics compression that these formats use.
When you are happy with the results:
- Choose Save As from the File Menu.
- Enter a name for your document.
- Choose a place to save...Disk called User Files is the place to store Files , you can create a directory/ folder with your name on it if you wish.
- Select a File Type, options include JPEG, GIF, Photoshop,PICT.
- Click SAVE
OCR Optical Character Recognition
To be used with the scanner is the OCR package called Omnipage Limited Edition.
Omnipage software lets you quickly convert printed documents into text that you can edit with your computer.
- Open Omnipage Limited Edition when the scanner indicates it is ready.
- Double Click on the OCR Icon on the desktop.
- Place Page on scanner, being careful to keep the text aligned as straight as possible.
- Everything is done from the one window that opens.
- Click the Aquire Image button ( the one that has a scanner a document and a hand all together ) or choose Aquire Image from the File Menu.
- The Load Scanner dialog appears: Click SCAN
- The Document is scanned and displayed in the Preview window. Click the OCR button or choose OCR from the File Menu.
- When the OCR is finished a dialog will appear giving the option to scan another page or to finish.
- After Finishing the Save As dialog box will appear, if it does not appear choose Save As from the File Menu.
- Enter a name for your document.
- Choose a place to save...Disk called User Files is the place to store Files , you can create a directory/ folder with your name on it if you wish.
- Click SAVE
Omnipage saves the file to the place of your choosing.
ScanGear Options Explained
Once the scanner has previewed your page, at the right hand side of the screen you can alter your scanning preferences:
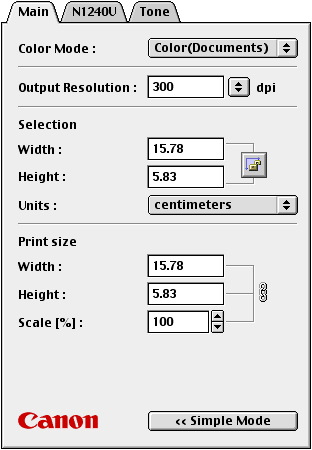
With Color Mode you can select whether you want colour or grayscale depending on what you are scanning.
With Output Resolution you can set the resolution that you want your image to be at. The higher you set this the better quality your final image will be, but the more disk space it will take up. A resolution of 200dpi should be good enough in most cases.
With Selection you can specify the width and height of the area you want scanned. The other way of choosing the area is simply to click and drag on the image itself.
Do not change print size as you cannot print from here.
Do not change the settings under N1240U.

Under Tone you can change contrast and brightness if you wish, just move the slider bars. Bear in mind that the default normal setting is with both sliders in the middle (at 0 on the scale)
Change the colour balance by changing the channel to either red, green or blue and then adjust the brightness and contrast of each colour with the sliders.
Moving the sliders while the channel is on master will adjust the brightness and contrast as a whole.
How to Get Your Files to Your Workstation or Unix Directory
There are two ways of getting your files, either Images or OCR, to your computer or to a unix directory.

The easiest way is to plug in a USB stick and simply copy the files across.
Users with Macintosh Desktops.
If File Sharing is turned on on your desktop then use the Chooser to connect to your Macintosh and copy the files, this is the easiest and most direct way.
UNIX Users
The easiest way to get files to a Unix Enviroment is to use a program called Fetch.
- Fetch is a Drag and Drop Capable FTP program, allowing uploading of files as Text,Binary, or automatic mode.
- From the File Menu choose New Connection.
- Server names DO NOT need to be appended with
ecs.vuw.ac.nz.
- From there you can either Drag the File or Files on to the file listing to initate the transfer, or use the PUT or GET buttons.
Holding SHIFT key while selecting files allows non consecutive multiple selections.
Other Useful Programs
Graphic Convertor, located in the SCANNER SOFTWARE Folder, in the popup tab at the bottom of the screen. Graphic Convertor can read and write most graphics formats.